
Ever thought of using assemblage art as part of a home-schooling class or stand-alone art project?
Assemblage is a unique art form that involves taking found or discarded objects and assembling them in unique ways, diverging from their original purposes. This medium is guaranteed to spark a child’s interest and creativity! It utilizes the kinetic and visual learning styles that help to integrate a particular subject, or concept, as well as introduce this lesser-known art form. It brings fun into the learning process!
It all begins with a simple home and/or neighborhood scavenger hunt. The items around your home that might be looked at as clutter, broken toys or jewelry, left over items in a drawer or things that need to be recycled are all objects that can be used to make assemblage art. This concept could have several facets to it such as:
1) learning about ‘assemblage art’ by referencing books such as the one listed below
2) the materials or objects used (that are readily available in your home) in making the art
3) learning about recycling and repurposing existing items that are around the house, your yard, neighborhood or garage
4) learn how to use basic hand tools and how to put things together with glue, a screwdriver and screws or brads, a drill, or wiring
.A Uniquely Creative Home School Project
With our experience as foster parents and Esther’s expertise as a psychotherapist, we recognize that kids today have an opportunity to learn new skills, and as well as new information by creating assemblage art. It is a much-needed alternative to being on the screen.
Today, making this type of art has emerged as an ideal DIY home school project. It’s a chance for the home schooler and parent to bond, have fun, and be creative, while learning about the subject at hand, and assemblage art. Your child’s creativity will be able to transform clutter or objects into cherished art pieces that brings pride, confidence, and a sense of making a difference environmentally.
Creating Assemblage Art as a Home School Project
To begin on your child’s home school assemblage art journey, follow these steps:
Step 1: Hunt and Gather
Who doesn’t like a scavenger hunt?! At home and in your neighborhood. Your child first finds objects—old toys, dusty heirlooms, tools, games, and their parts, even items found in the street or alleys. Remember, every part of an object is equally worthy of use, like taking apart a discarded toy and seeing each part as a potential object. After the hunt, gather the objects to “show and tell” before they are ready for assembling them. Some will be used; others set aside for future art pieces. You can also have fun exploring what these objects were originally used for, what type of material it is, even doing research where they were invented, history and manufacturing process.
Step 2: Discover Your Subject
As the teacher you will be thinking “outside the box” on how to use assemblage art in the various subjects you are teaching. For example, for math: creating different geometric shapes with 3-D objects, rather than the traditional drawing one dimensional shapes on paper. The 3D aspect brings the shapes alive and fully integrates the material for your child. The same can happen in science by ‘drawing with objects’, the current subject of interest could be biology, botany, chemistry, history, physics, or astronomy.
Step 3: Bring it Together
The student will determine how the objects will be contained. Option include a sculpture, on a picture frame, in a box, or adhered to an unconventional surface. Encourage the creativity to flow freely during this stage. Ideas will bounce around as your child engages with the objects, arranging and rearranging them within their chosen setting. Once satisfied with the assembly, take pictures to preserve the original vision before permanent attachment.
Step 4: Make it Permanent
Kids will learn and practice using various tools to adhere objects to each other and the final surface. Basic hand tool skills are invaluable in equipping your child to deal with the world at large. This skill is sorely lacking in many young people these days. Use appropriate adhesives based on surface materials, such as E6000 for versatility, wood glue for wood, and epoxy for challenging surfaces. Prioritize safety (gloves, ventilation, etc.) and patience throughout the process. Start with the object that directly needs to adhere to the backing and wait for it to dry. Continue this process with each layer of materials, until the sculpture looks like the photo you took initially or is altered to the artist’s satisfaction. This exercise encourages young minds to see and think in layers, as well as exhibit patience.
Have the child explain their art piece in reference to the subject matter being taught, name the art piece, and find a place in your home to display it. Each child will take pride in their contribution, the knowledge they acquired along the way, and the shared experience of creating art using discarded 3D objects that possibly were not being used and needed to be recycled or discarded.
Discovering Education and Connection Through Art
Assemblage is a beautiful way to encourage education while fostering fun, joy, creativity, cooperation, and connection — and transforming clutter into a one-of-a-kind educational experience. During our own process of creating offbeat, humorous, informative, and sometimes serious assemblage art, we’ve noticed a constant stream of interest from family, kids, friends, and even strangers who enjoyed the creative process and collecting the art. Pieces created simply for the joy of it are being purchased by collectors, shown in galleries, which has prompted a demand for workshops for assemblage art making.
No prior experience or special instructions are needed—just a willingness to repurpose objects creatively and rediscover the joy of spending quality time together as a tool for learning.
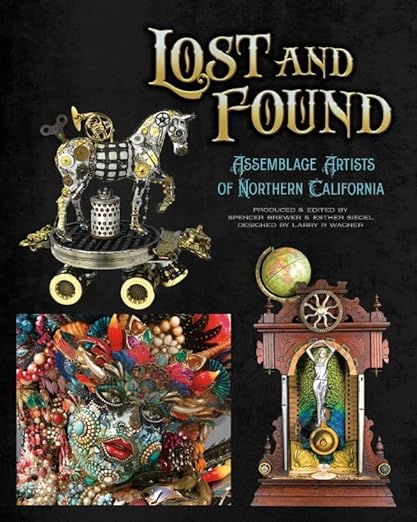
To get inspired, explore Lost and Found: Assemblage Artists of Northern California, our multi-award-winning book. It offers a delightful and thought-provoking tour into the world of assemblage art through the eyes and hands of eight prominent Northern California assemblage artists — including us! .

Spencer Brewer
Spencer has been creating art and music since he was a young boy. For most of his adult life he was in the music business, recording and producing hundreds of records while working as a technician on over 20,000 pianos, crank phonographs and pump organs. Collecting and working on pianos, he eventually found himself creating assemblage art before he knew what it was called. When the music industry collapsed in 2008, he shifted his focus to assemblage art full time.
Esther Siegel
Esther Siegel is a psychotherapist by training who has worked in the field of book art, been active in the scrapbooking world, and created both greeting cards and ‘found art’ sculptures. A late-in-life artist, she creates pieces that are a mixture of the whimsical and dark humor. They include Book-Mobiles & Book Art, Twisted Toasters (vintage toasters as the base), Horse People (horse/doll combo), fun repurposed sculptures, small lamps and Altered Barbies.
Brewer and Siegel are the co-authors of Lost and Found: Assemblage Artists of Northern California. A portion of proceeds from the book will be used to help internationally-acclaimed assemblage artist Larry Fuente, who lost his 8,000-square-foot warehouse of finished pieces and art supplies to a devastating California wildfire.
Thank you,
Glenda, Charlie and David Cates
Let us know if you enjoyed this post!

Like

Love

Happy

Haha

Sad